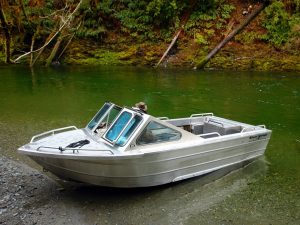
DIY Mini Jet Boat Building for Beginners: A Complete Guide
Ever dreamt of building your own boat? The thrill of conquering the water in a vessel you crafted yourself is unparalleled. This comprehensive guide walks you through building a mini jet boat, perfect for beginners. We'll cover everything from planning and material selection to assembly and testing, ensuring you have a safe and enjoyable building experience.
Phase 1: Planning Your Mini Jet Boat
Before diving into construction, meticulous planning is crucial. This phase sets the foundation for a successful project. Begin by sketching your design. Consider the boat's dimensions â€" length, width, and depth. Keep it small and manageable for a beginner's project. A length of 3-4 feet is a good starting point. Next, determine the type of material you'll use; plywood is a popular choice for its affordability and ease of workability. Finally, research and select a suitable jet pump. Smaller, readily available pumps from hobby stores work well for mini jet boats. This initial design process allows you to visualize your creation and anticipate potential challenges.
Choosing the Right Materials
Selecting quality materials directly impacts the boat's performance and longevity. Marine-grade plywood offers superior water resistance compared to standard plywood, extending the life of your boat. Consider the thickness; ½-inch plywood provides a good balance of strength and ease of handling. You'll also need waterproof wood glue, screws, sealant, paint, and, of course, your chosen jet pump and motor. Remember to factor in the cost of each item before you begin purchasing.
Phase 2: Construction â€" Bringing Your Design to Life
With your plans finalized and materials gathered, construction commences. Start by cutting the plywood pieces according to your design. Use a jigsaw or circular saw for accurate cuts. Carefully assemble the hull, ensuring all joints are tight and secure using waterproof wood glue and screws. Reinforce critical areas, such as the transom (the back of the boat where the jet pump mounts), with extra layers of plywood or fiberglass for added strength. Remember to seal all seams to prevent water leakage. This step demands precision and patience, but the satisfaction of seeing your boat take shape is incredibly rewarding.
Installing the Jet Pump and Motor
The jet pump is the heart of your mini jet boat. Carefully follow the manufacturer's instructions for installation. Securely mount the pump to the transom, ensuring proper alignment. Attach the motor to the pump, following the manufacturer's instructions meticulously. Pay close attention to wiring and connections. Test the motor and pump before fully integrating them into the boat's hull. This prevents potential complications during the final stages of assembly.
Phase 3: Finishing Touches and Testing
Once the hull and propulsion system are in place, add the final touches. Apply a waterproof sealant to all joints and seams for added protection against water damage. Paint the boat with durable, waterproof paint in your chosen color scheme. This not only enhances the aesthetics but also adds another layer of protection to the wood. Let the paint dry completely before proceeding to the next step.
Testing Your Mini Jet Boat
The moment of truth! Carefully launch your mini jet boat into calm water. Start the motor and gradually increase the throttle. Observe the boat's performance, noting any unusual vibrations or leaks. Make any necessary adjustments to ensure smooth operation. This test run will identify potential problems and provide valuable feedback for future improvements. Remember to wear a life jacket during testing.
Building your mini jet boat is a challenging yet rewarding project. By following these steps and exercising patience and precision, you will create a fun and functional vessel. Remember safety first, and enjoy the ride!


No comments:
Post a Comment
Note: Only a member of this blog may post a comment.